Getting Started with GenogramAI
Create your first genogram in a few minutes: find your way around the editor, add people, and save your work.
This guide takes you from a new account to a finished first genogram. If you prefer to learn by doing, the guided tour walks you through the same steps on a practice genogram.
Step 1: Start a genogram
After you sign in you land on the Dashboard. Click New genogram at the top of the sidebar. A short window asks Who is this genogram about?: type their Name, pick their Sex and click Create genogram (Clinical plan users also see a Clinical Mode switch there). Describe your family instead lets the AI build it from a description. The arrow next to it lists every other way to start, including Create with AI (describe a family in words), Import with AI (from a photo) and Import (GEDCOM and other family tree files). The AI and import options are part of Pro; see Plans and pricing.
Step 2: Find your way around the editor
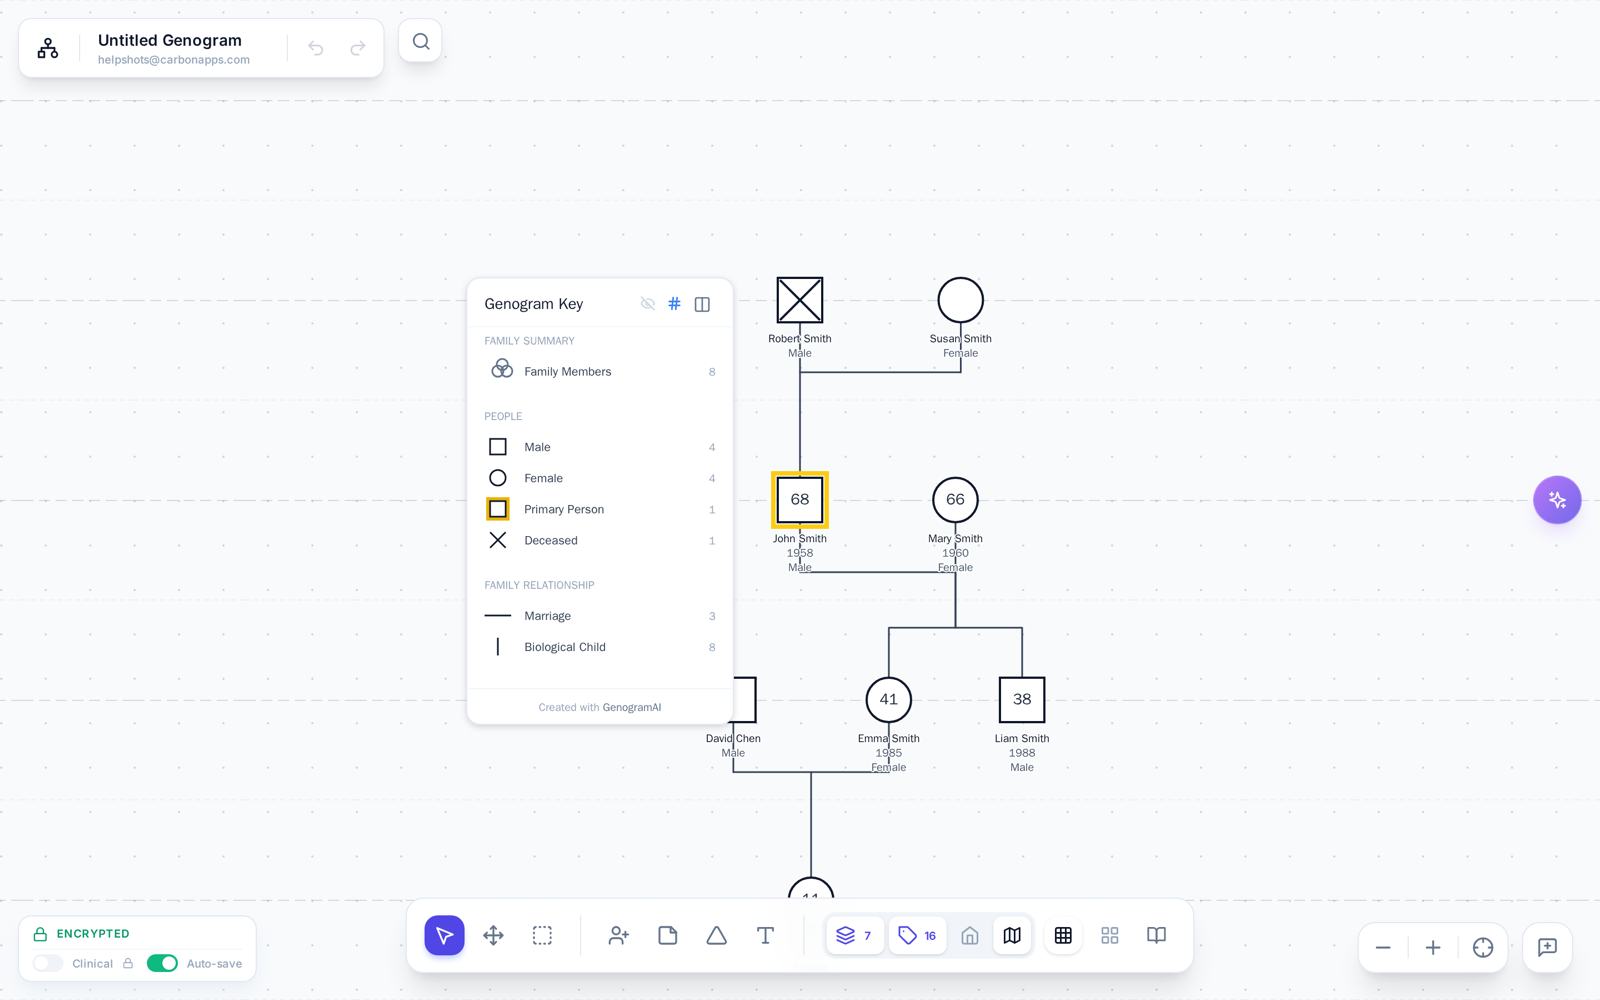
- File menu (the GenogramAI logo, top left): Back to Files, New, Duplicate, the save status with Save now, Export (Image, PDF, Print, GEDCOM, Report, Download local copy), Chronology, Present, Share, and icons for Settings and Canvas settings at the bottom. Undo and redo sit right next to it.
- Toolbar (bottom centre; on a tall, narrow window it moves to the left edge): Select, Pan, Bulk Select, Add Person, notes, secrets, text, the household lasso, Views, Text Labels, the key, Snap to Grid, the clock View as of a year, Auto Arrange and Library. On a narrow window only Select, Pan, Add Person, Views and Text Labels show, plus a More tools chevron at the right end that expands the bar with everything else.
- Ask AI (top right, or Cmd/Ctrl + K): opens the AI Assistant, which can build or edit the genogram from plain language. Next to it are two icon buttons: Share (share icon) and Send feedback (speech bubble).
- Bottom left: the save status and the Clinical and Auto-save switches. Bottom right: Zoom Out, Zoom In and Fit genogram to screen.
Step 3: Add the first person
- Click Add Person in the toolbar (or press A)
- Under People, choose Male, Female, Non-Binary or Unknown, or Trans / more for Trans Male, Trans Female, Intersex and Other. The menu also has a Pregnancy group (Pregnancy, Miscarriage, Abortion, Stillbirth) and Other (Pet, Unnamed).
- The person appears on the canvas and the Inspector panel opens on the right, where you type their name and details
More detail: Creating your first person.
Step 4: Add the family around them
Click a person and a ring of quick-add buttons appears around them: Add Parents, Add Partner, Add Sibling, Add Child, Emotional Line and Draw Connection. Each add button adds the person and the right line in one click; hover Add Parents or Add Child for step, adoptive and foster choices. You can also right-click a person for the same options. See Using the quick-add buttons.
Faster: describe the family
Open Ask AI and type something like "Maria (52) and José (55) married in 1995 and have two children, Ana and Luis." The assistant adds everyone with the right lines. Free accounts get 5 AI credits a month; Pro and Clinical are unlimited.
Step 5: Add details
Click anyone to open the Inspector and add names, birth and death dates, occupation, medical conditions, heritage, religion, location and notes. Use Views in the toolbar to show medical, cultural and other overlays, and Text Labels to choose what text appears under each person.
Step 6: Your work saves itself
With Auto-save on (bottom left), every change is encrypted and saved to your cloud workspace within a few seconds. When you are ready to share it, use Export > Image… or Print…, or Share, in the File menu. See Cloud storage and auto-save and Printing and saving as PDF.
Made a mistake?
Press Cmd/Ctrl + Z or the undo arrow next to the File menu. Everything else is in Editing, deleting and fixing mistakes.